09. Project Instructions for workspaces
Running the Extended Kalman Filter project in workspaces
This workspace is designed to be a simple, easy to use environment in which you can code and run the Extended Kalman Filter project.
For tips on workspace use, please review the Workspaces lesson earlier in the program.
Accessing and using the workspace:
- Navigate to the workspace node. If you need to test your solution, enable the GPU - otherwise you won't be able to run the simulator. Remember to turn it off when you code your solution so that you don't run out of GPU hours.
-
Navigate to the repository
CarND-Extended-Kalman-Filter-Projectusing the file and directory menu on the left. -
Run
./install-ubuntu.shin the terminal window to make sure the necessary dependencies are installed (you may need to runchmod u+x install-ubuntu.shto make the file executable). -
Complete the
TODOin FusionEKF.cpp, FusionEKF.h, kalman_filter.cpp, kalman_filter.h, tools.cpp and tools.h using the text editor in the workspace. - Navigate to the project repository in the terminal.
The main program can be built and run by doing the following from the project top directory:
-
mkdir build && cd build -
cmake .. && make -
./ExtendedKF
Click on the "Simulator" button in the bottom of the Udacity workspace, which will open a new virtual desktop. You should see a "Simulator" link on the virtual desktop. Double-click the "Simulator" link in that desktop to start the simulator.
**Important: ** You need to open a terminal before attempting to run the simulator.
Extended Kalman Filter Simulator
- In the main menu screen select Project 1/2 EKF and UKF.
- Once the scene is loaded you can hit the START button to observe how the object moves and how measurement markers are positioned in the data set. Also for more experimentation, "Data set 2" is included which is a reversed version of "Data set 1", also the second data set starts with a radar measurement where the first data set starts with a lidar measurement. At any time you can press the PAUSE button, to pause the scene or hit the RESTART button to reset the scene. Also, the ARROW KEYS can be used to move the camera around, and the top left ZOOM IN/OUT buttons can be used to focus the camera. Pressing the ESCAPE KEY returns to the simulator main menu.
NOTES:
-
Currently hitting Restart or switching between data sets only refreshes the simulator state and not the Kalman Filter's saved results. The current procedure for refreshing the Kalman Filter is to close the connection,
ctrl+cand reopen it,./ExtendedKF. If you don't do this when trying to run a different data set or running the same data set multiple times in a row, the RMSE values will become large because of the previous different filter results still being observed in memory. -
The two functions in
tools.cppneed to be implemented for the simulator to avoid throwing a segmentation fault - make sure to get those built out in order to test in the simulator!
Common Issues
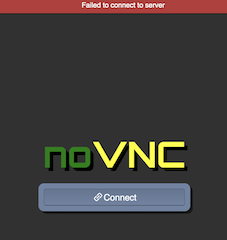
- " No VNC " or " Service is not running " error when launching simulator - this is related to either A) not having the workspace GPU enabled (the simulator needs a GPU to run), or B) the web browser being used. Safari is likely to produce this error, while Chrome should run the simulator fine.
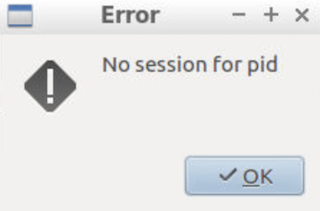
- " No session for PID " error when launching simulator - when the desktop simulator is opened, sometimes a "PID error" window will appear. This error does not impact the simulator itself and can be safely ignored or click OK, it is harmless.
- Missing simulator icon - the simulator icon may fail to appear after a short wait within the Linux Desktop. If this is the case, click on the Terminal icon in the Desktop, and the simulator icon will typically appear. Please note that you still will use the actual Terminal within the primary workspace, and not the one in the Desktop.
Commit to GitHub
Students are highly encouraged to commit their project to a GitHub repo. To do this, you must change the upstream of the current repository and add your credentials. We have supplied a bash script to help you do this. Please open up a terminal, navigate to the project repository, and enter:
./set_git.sh
, then follow the prompts. This will set the upstream remote to your own repository and add your email and username to the git configuration. At this time we are not configuring passwords, so you will need to enter your username and password for each push. Since credentials are not persistent, it will be necessary to run this script each time you open, refresh, or reset the workspace.
Project submission when using the workspace:
Check your project against the project rubric . Make sure your RMSE values satisfy the thresholds listed in the rubric!
Click on the
Submit project
button in the workspace and follow the instructions.
Things to keep in mind:
- If you leave your workspace unattended, it will time out and need to be refreshed. Your most recent work will be restored, but the list of open files or any running shell sessions will not be restored.
- Remember to turn off your GPU when coding your solution and just turn it on when you want to test your code.
Project Support
If you are stuck or having difficulties with the project, don't lose hope! Remember to talk to your mentors and fellow students in your Study Group, as well as ask (and answer!) questions on Knowledge tagged with the project name. We also have a previously recorded project Q&A that you can watch here !